Archive for the ‘Avid Technical Tips’ category

Syncing Dailies

January 12, 2011

In 2011, hand syncing of dailies seems downright anachronistic. Doesn’t timecode make all that trivial? Yes, with digital cameras, automatic syncing is standard practice. But this inevitably involves two clocks, and that means they are subject to drift. It doesn’t take much drift to put you out of sync a frame or two. Production is supposed to jam (synchronize) their clocks several times a day, but in the heat of battle that doesn’t always happen. The result is that picture and sound slowly drift out of sync.

In my editing rooms, we always check sync using slates, and resync if necessary. This takes time, but sync starts with dailies. If you’re in sync there, you have a shot at staying in sync further down the food chain.

Media Composer allows us to sync in two ways. First, you can use Autosync to merge audio and video clips. If your clips are pre-synchronized, load them into the source monitor, select video or audio and subclip to separate picture and sound. Then mark the slates and autosync to merge them again.

Second, and even better, you can use the Perf Slip feature to sync to the nearest 1/4 frame. Perf Slip is slick and quick but it comes with some limitations. You have to turn on film options when you first create your project — even if you never plan to touch a frame of film. It only works in 24 or 23.976 projects. And it only works on subclips. It comes with a couple of other minor limitations, as well, but I used it successfully on my last Red show, and wouldn’t want to be without it.

Either way, you’ll have to check every slate by eye. That’s trivial, right? You just line up the visual slate closure with the sound clap and you’re all set. True, but many slates are ambiguous. How you handle them is crucial to good sync. When we worked with film there was plenty of debate among assistant editors about this. Today, it’s a lost art. Here’s my interpretation.

First, you can’t sync properly without checking at least three frames — the frame where the slate closes, the frame before it, and the frame after it. Only with that context can you understand what happened at the slate closure. There are three possible cases.

Case 1 — Normal

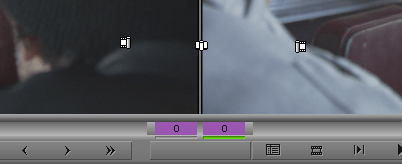
In the first frame, the slate is clearly open, in the second it’s clearly closed, and in the third, it’s closed, as well. That’s the standard situation — no ambiguity, no blurred images. We make the assumption that the camera is making its exposure in the middle of each frame. In frame one, the slate is open. In frame two, it’s closed. So the slate hit somewhere between those two exposures. Check the images below (click to blow them up). The waveform of the clap is lined up at the head of frame two. That’s as close as we can get.

Case 2 — Blurred but Closed

Here we see a blurred frame 2. To decide where to put the audio clap, we have to examine that blurred image carefully. Did the slate close while the shutter was open? Notice that within the blurred image you can see both the top and bottom of the closed slate. The shutter was open when the slate closed and the camera captured an image of the closed slate within the blur. The audio clap goes in the middle of that frame. (Click to blow it up.)

Case 3 — Blurred but Open

Here, the second frame is blurred, but if we look closely, it remains open. The camera captured the slate in motion, but not in its fully closed position. The first closed frame is frame 3. So we sync between frame 2 and 3.

Syncing with this kind of accuracy takes work — blurred slates are always somewhat ambiguous. But if you look carefully, you can generally assign all slates to one of these three cases. If you’re syncing to the nearest frame, you won’t be able to achieve this much precision, but at least you’ll know what you’re aiming for.

Keep in mind that in a 24-frame environment, the camera is typically shooting at about 1/50th of a second and that the exposure occurs in the middle of a frame that’s being displayed for a 24th of a second. With that idea in mind, you should be able to sync as precisely as anyone ever did in a film editing room.

If you’re interested in more Media Composer techniques like this, check out my new book, Avid Agility. You can find out more about it here on the blog, or at Amazon.

Slipping and Sliding in MC5

December 6, 2010

In Media Composer 4, if you lassoed a clip from right to left, you selected it for slipping. Adding the Option key (Alt in the PC world) selected it for sliding. Many people have bemoaned the loss of this functionality in Version 5, but, in fact, it’s still there. The modifier keys have changed, and there’s also a hidden gotcha that can make you think the functionality has been lost.

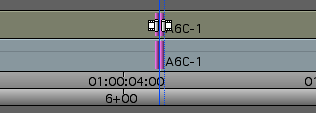
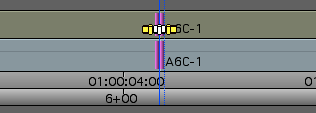
Lassoing from right to left still works as before, selecting a clip for slipping. But the Option key is now used to let you lasso clips anywhere in the timeline. So to select a clip for sliding you have to add another modifier: Option+Shift.

The trick is that this works a lot better if no clips are selected in the timeline.

So here’s the drill:

  1. First, click above the topmost video track or below the bottommost audio track to deselect all clips.
  2. Then, to slip, lasso or Option-lasso a clip or clips from right to left. Rollers will appear at the interior edges, ready for slipping.
  3. To slide, Shift-Option-lasso from right to left. Rollers appear on the outside edges of the clip(s), ready for sliding.

That’s it. Once you know the technique, it’s easy to use. Just don’t forget to deselect all clips before you start. You may be able to get into slip or slide anyway, but things will work more predictably if nothing is selected.

This is the quickest way to slip or slide a group of clips at once. But you can slip or slide clips in several other ways, as well. Get into trim mode any way you like. Then double-click a roller to select the clip it’s on for slipping. Double-click the roller a second time to slide. Or right-click on a roller to open a contextual menu and select slip or slide from there. Or use either of the Trim Smart Tools and select rollers, as needed.

More on the Smart Tool

October 20, 2010

Avid’s new Smart Tool  promises a more intuitive, drag-and-drop approach to timeline editing and is designed to compete head-on with Final Cut and Premiere. But for many long-time Avid editors, the first response is, “how do I turn it off?”

The dilemma is a classic one and goes to the heart of how we learn to use any tool. For newbies, an interface wants to be immediately obvious and welcoming. But power users want speed. The best interface combines elements of both and is malleable enough to grow with you as your needs evolve.

I’m just finishing a show on MC5, and have tried several approaches to the Smart Tool. Here’s the setup that I’ve settled on (so far):

  1. Upgrade to one of the recent patch releases (5.0.3.1 – 5.0.3.4). Trim mode in these builds will be much more familiar to long-time Media Composer users. Then enter trim mode by lassoing, or by hitting the Trim Mode button (not the Smart Tool). This gives you something closely approximating old-style trim mode. For details, see this post.
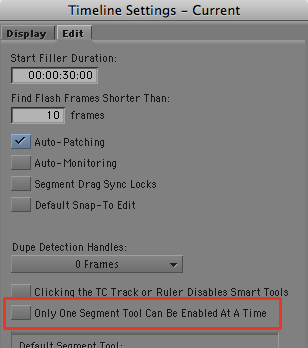
  2. Go to the Edit tab of Timeline settings and select the following. You may also want to select “Clicking the TC Track or Ruler Disables Smart Tools.”
  3. Then activate only one Smart Tool — the keyframe tool. Leave all the others off. This gives you permanent access to audio keyframes, which matches past behavior. But more important, because you are leaving one tool on all the time, the tool palette won’t reset itself when you start up MC. It’ll come back as you left it when you quit. (If a tool is on when you quit, that’s the way the system will start up. If nothing is on, the tool resets itself.)
  4. Assign the segment tools to your keyboard and turn them on and off from there, as needed. (By default, you’ll find them on Shift-A, and Shift-S.)

You’ll probably have to do some experimentation to get things to work for you, but those are the key ingredients in creating a more familiar, version 4-style editing experience.

Tweaking the Smart Tool

October 4, 2010

Avid has quietly released some important improvements to the Smart Tool — features that go a long way toward making Trim and Segment modes function the way they did in Version 4. The updates are incorporated into recent “patch” releases, and therein lies a rub. Patch builds are designed to quickly solve specific customer problems, and they aren’t as fully tested as regular releases are. But I’ve been using version 5.0.3.1 for a month now, and I wouldn’t want to go back.

What are the changes? The first is in Trim Mode. Since the early ’90s, when you hovered your mouse over the Composer Window you saw three selection cursors: left, center, or right.

If you hovered your mouse over a transition in the timeline, you’d saw only two — left and right, no center. That made roller selection easier and more positive.

But now, with the Version 5 Smart Tool, you see three cursors in the Timeline, just like you do in the Composer.

This makes it much harder to predictably select one side or the other — that pesky center cursor gets in the way.

But Version 5.0.3.1 changes all that. If you enter Trim Mode by lassoing transitions or by clicking the Trim Mode button, and if the Smart Tool trim buttons are off, the center cursor doesn’t appear in the Timeline. (It’s still present in the Composer Window.) So roller selection feels much more predictable and much more like it was in Version 4. If you’ve been frustrated with Trim Mode in MC5, this fix is going to make you a lot happier.

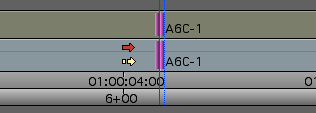
The second change is in Segment Mode. In Version 4, you couldn’t have both red and yellow segment modes on simultaneously. If red was on and you clicked yellow you simply switched from one to the other. Version 5 allows both modes to be on simultaneously — you’ll see red when you hover over the top of a clip and yellow over the bottom.

For some people that’s more flexible, but if you prefer the old way, you can now have it via a selection in the Edit tab of Timeline Settings: “Only One Segment Tool Can Be Enabled At A Time.” Turn it on and you’ll get the Segment Mode of your choice — but when you turn one on, the other goes off.

Together these changes amount to a major improvement for folks like me who work in dense, multitrack timelines. The catch is that the only way to get them is via a patch release. If you’re willing to take a chance, jump in. If not, waiting till the next point release should get you these fixes in a fully tested build.

Avid’s patch releases are here. Keep in mind that with Avid’s new installer, upgrading is much easier. For more about the upgrade process, see this post.

Improving the Look of Your Titles

September 28, 2010

Avid’s venerable Title Tool has come in for a lot of criticism over the years, but despite its limitations, it’s often the best way to get a simple titling job done, and it has many hidden features that many people don’t seem to know about. Here are a couple of my favorites.

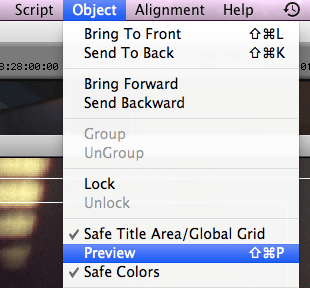
First, when you’re creating a title, the tool normally defaults to draft mode, which makes your titles look crude and aliased until the title is actually created. That made sense in years past when processors were slower, but today you can work just as quickly in what Avid calls Preview Mode, and your work will look exactly as it will when your title is rendered. You’ll find the Preview command in the Object menu.

Here’s a title in draft mode:

And here it is in Preview mode, looking just like it will when edited into the timeline.

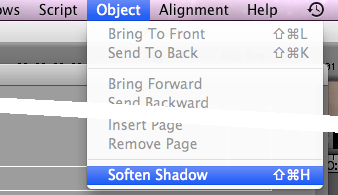
Second, Media Composer normally creates harsh and crude drop shadows — but you can soften them with a simple menu pick, and if you do, they’ll look a  lot more subtle. This option is also in the Object menu.

Here’s a standard drop shadow:

And here’s the same shadow, softened:

Finally, when you open the title tool, a font is selected by default. On the Mac, it’s Geneva, which is rarely what you want. You can’t permanently change the default, but as long as there’s no title present in the title tool, the font and size selections you make are “sticky” and will persist as the default until you quit. If you want to make a series of titles in 24 pt Helvetica, for example, start by selecting those options — before making your first title.

Avid Agility at Amazon / PDF Samples

September 25, 2010

For those of you curious to get a look at the merchandise, I’ve uploaded some sample pages from Avid Agility. To make the files small, image quality is somewhat degraded, but I think you’ll get the idea. You can purchase the book from the publisher, CreateSpace, and now from Amazon, as well. (Amazon’s “look inside” feature will be live in a couple of days.)

• Table of Contents

• Chapter 7 – Trim Mode – first pages

• Chapter 11 – Audio – stereo tracks and clips

• Chapter 12 – Visual Effects – advanced keyframes