Last night I spent a few hours trying to cut together some videos I made with a couple of still cameras. I’ve come to love these things for informal recording. They’re so small that they’re always with you, and since the size of the memory card is limited, you tend to be more selective and often produce better material.
The videos live in iPhoto, so I decided to try cutting them with iMovie and, since I have it handy, with Media Composer software, as well. The source files were in two sizes: 640×480 and 848×480. Both iMovie and Media Composer insist on converting them during import.
That’s the first frustration — if you uprez to DV, you’ll more than double the size on disk just to get started. I’d much prefer to leave the sources untouched.
The second frustration regards import settings. iMovie did a good, automatic job resizing the videos to DV dimensions. Media Composer worked well, too, but only after lots of experimentation. That’s because the import settings dialog, while very flexible, is damn near incomprehensible. For starters, video settings are perversely labeled “image,” so at first you think you’re in the wrong place. Then you come to the choices themselves:

I have yet to meet anyone who knows what they actually mean. What’s the difference between “Maintain, square” and “Maintain and Resize, square?” How the heck can you maintain and resize at the same time? Everybody I know just tries these things one at a time until they get what they want. A built in preview sure would save time and frustration.
Once you’ve figured out the settings, it’s time to import. And therein lies my third gripe: Avid’s progress bar. This has been with us for so long we barely notice it anymore, but humor me for a second. What is the key piece of information you want this thing to tell you? You want to know how long you’re going to have to wait, right?
In the world of Media Composer that is not readily available. First you have to know to press the T key. Then you must do a timecode subtraction. Oh heck, that’s easy. Let’s see, 23:39 minus 17:05…6:34. No problem!

This is particularly important since both programs can’t import in the background. But wouldn’t that be wonderful? You could actually get something done during an import.
I was actually importing several videos, and iMovie very helpfully told me how long the whole process was going to take. Media Composer, designed in an age where imports were relatively rare, only tells you about the current clip. You learn nothing about how long the whole job might take or even where you are in the list.
Bottom line, iMovie is much more friendly during clip import. Of course, Media Composer wasn’t designed for consumer video and most people aren’t using it that way. But we’re entering a world where everything is going to be file-based, where we’re all going to spend an increasing portion of our time dealing with these things. The process is badly in need of a refresh.
In the end, bringing the files in took so long that I was only able to make a couple of cuts before calling it a night. And here, of course, there was no contest whatsoever. The kind of precise work we do all day long in our editing rooms is simply impossible with iMovie. Heck, you can’t even make an overlap, let alone an audio dissolve.
I’ll be putting this project together over the next couple of weeks and I imagine there will be a few more lessons. If so, I’ll post them here.
Technorati Tags: avid, edit, video
 As part of my little home movie session Sunday I needed to apply a couple of fades.
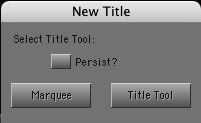 Actually, it’d be much easier to talk about what’s right with it, because the list would be so much shorter: it makes titles that can be supered over picture. Wow. That was an exciting thing a decade ago. Today, we see the same bugs, the same quirks, the same limitations that have been there all along, namely:


Recent Comments